Blueprint Documents
Working with a document Blueprint has two distinct stages:
- Build the Blueprint — define the document's sections once, and how each one behaves. You do this once per document type.
- Write a document with it — supply a brief and context, then review what the agent drafts. You do this every time you need another document.
Automatic extraction and generated writing are starting points. Review the structure while building the Blueprint, and fact-check every finished document.
Part 1: Build the Blueprint
Start a new Blueprint
Open Library, switch to Blueprints, and select + New blueprint. Then choose Upload a file or Describe it.
If you want a single document you keep editing over time — a CV, a capability statement — tick This is a single document I maintain over time. Leave it clear when the Blueprint should produce separate documents each time. See Documents you maintain over time.
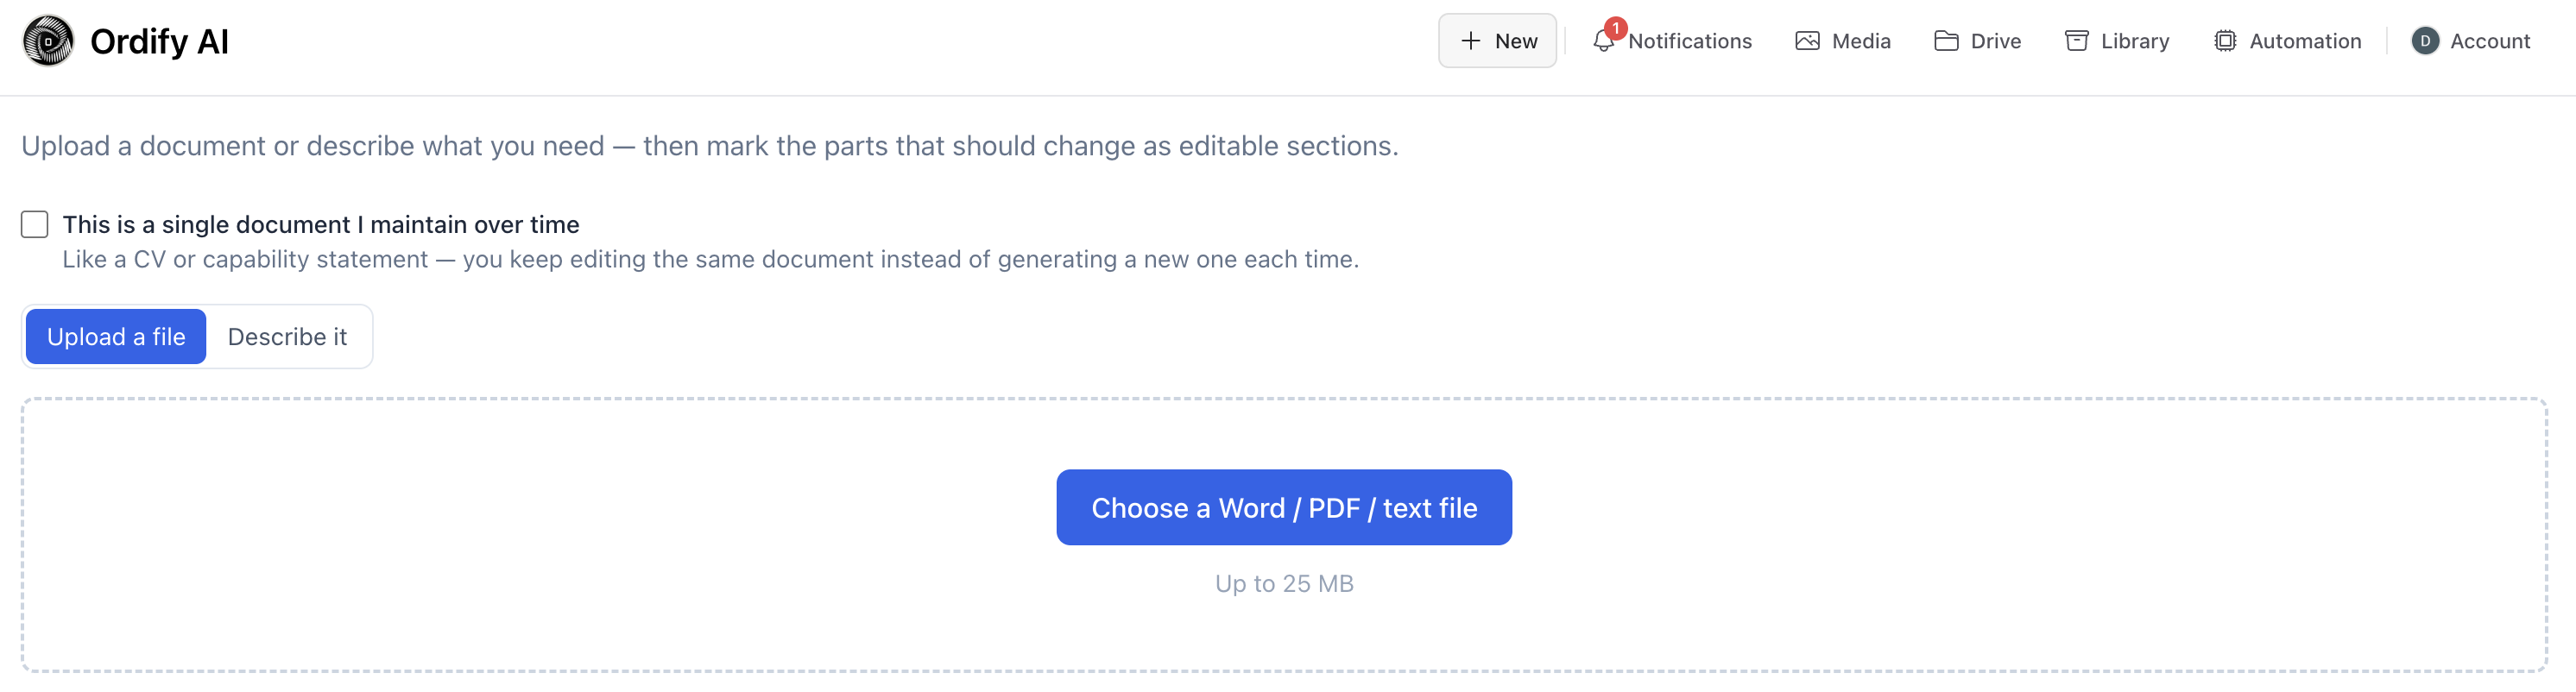
Choose whether to upload a source file or describe the document, and whether to maintain one document over time.
Build from an uploaded document
With Upload a file selected, add the source document. Ordify reads it and proposes a structure: a name and description, a set of sections, and the fields it thinks vary between documents.
Extraction may not reproduce the source perfectly, so the proposal needs review. Working through it is the bulk of building a Blueprint from a file, and the sections below cover it.
Build from a written description
Choose Describe it when you have no source file. Include:
- The document's purpose and audience
- The sections it needs and their preferred order
- Language or headings that should remain fixed
- Content the agent should draft from context
- Any constraints the finished document must follow
A specific description produces a more useful starting point. The generated structure then needs the same review as an uploaded one.
Name and describe the Blueprint
Once Ordify has read the file or description, Document details shows the proposed name and description. Check the Blueprint name (Document name for a document you maintain over time) and the Description, which appears in the Library and is inherited by documents made from the Blueprint. Select Continue.
Review the sections and fields
Treat the generated outline as a proposal, not a final structure. For every section, check:
- Whether the title and boundaries match the source
- Whether adjacent content was merged correctly
- Whether content is missing, duplicated, or out of order
- Whether the proposed section type matches the intended behavior
- Whether its writing guidance tells the agent what to write
- Whether suggested fields represent real variable values rather than fixed content
Keep only the fields that genuinely change between documents, and keep their names unambiguous — prefer Client legal name and Project start date over Name and Date.
To add a field the extraction missed, highlight the text in a Locked section — a client name, date, or amount. Each field is filled in once and applied everywhere it appears.
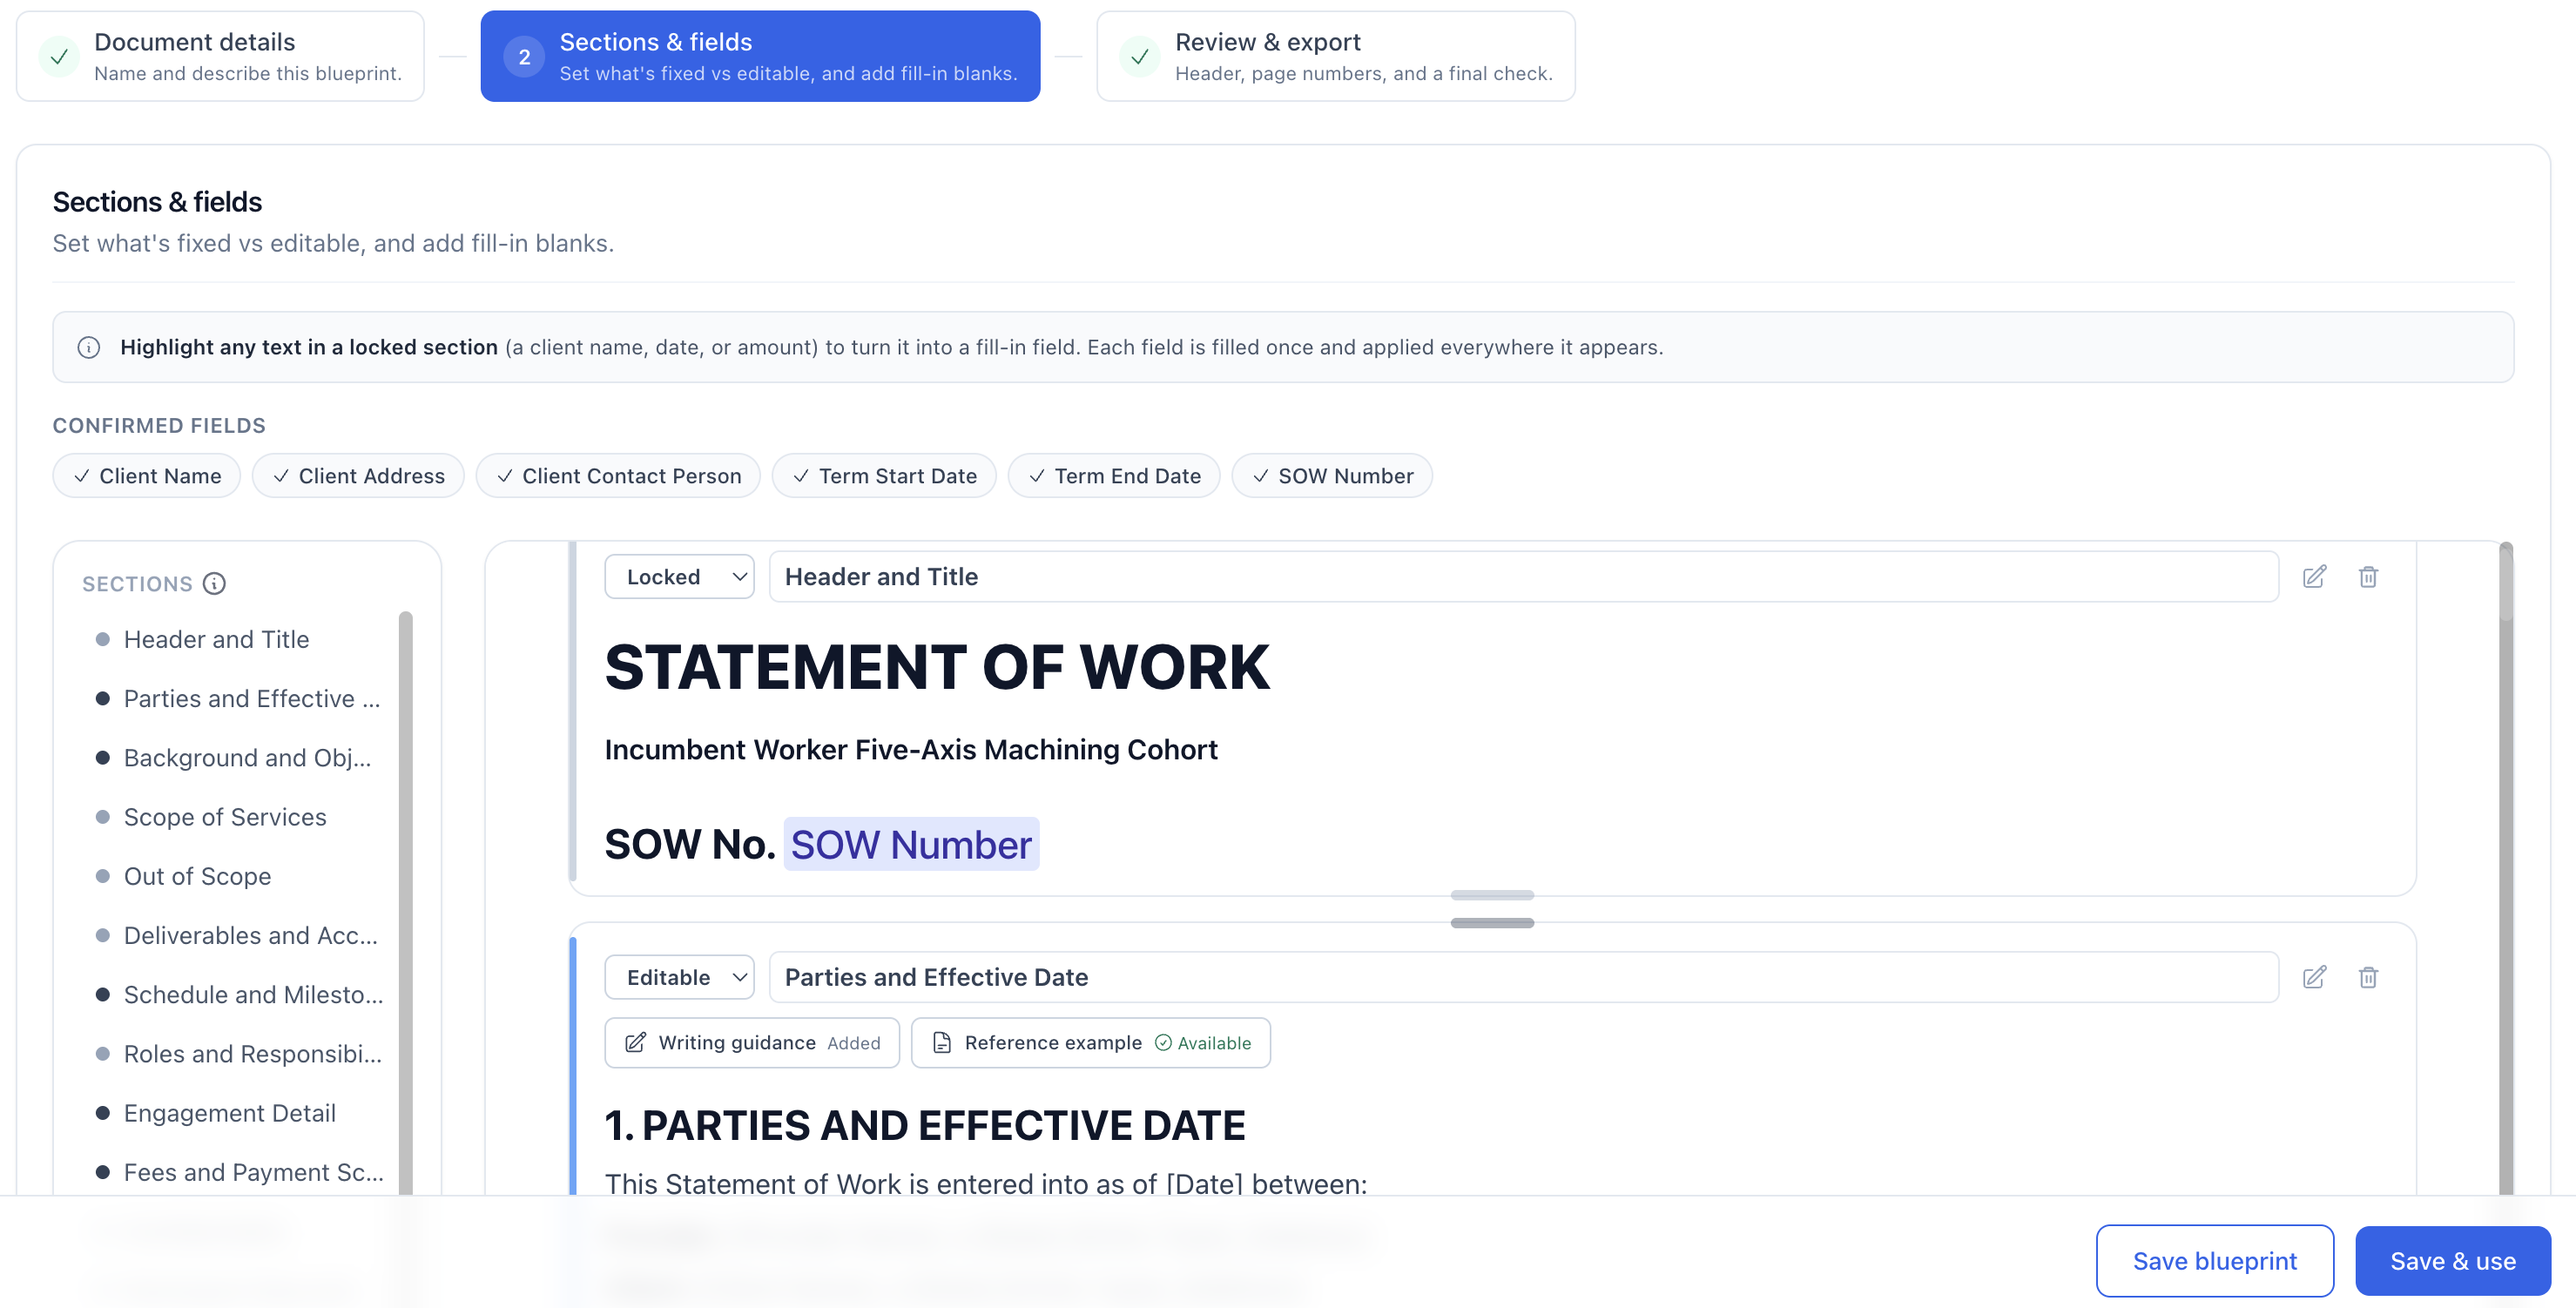
Confirm the fields, then review each section and its controls. Shown here in the editor for a saved Blueprint.
Set each section's type
Section types control whether content stays stable, is drafted for each use, or grows over time. This is the most important decision in the Blueprint — it determines what the agent is allowed to change.
| Type | What it means | When to use it |
|---|---|---|
| Locked | Content intended to remain consistent across uses | Headings, approved boilerplate, disclaimers, standard instructions |
| Editable | Content the agent drafts from the section's writing guidance, brief, and supplied context | Client-specific scope, summaries, milestones, risks, recommendations |
| Append | A section that collects new information over time instead of being rewritten | Ongoing accomplishments, project updates, a growing work history |
Append is offered on every Blueprint, but it is meant for documents you maintain over time. Locked content is meant to stay consistent, but confirm it during final review rather than assuming it.
To change a type, select the section during structure review and choose the type you want. Recheck the writing guidance afterwards, because changing the type changes how the section behaves.
Write each section's guidance
A section's Writing guidance tells the agent what belongs in that section. It does not create facts that were not supplied in the brief or supporting context.
Useful guidance names the expected content, source, format, and limits:
- Executive summary: “Summarize the confirmed business problem, proposed approach, and expected outcome in 100–150 words. Use only the project brief and attached discovery notes.”
- Scope: “List the approved deliverables as bullets. Include an owner and due date only when the source material provides them.”
- Meeting decisions: “List decisions explicitly recorded in the meeting notes. If no decision was recorded, write ‘No decision recorded’ rather than inferring one.”
- Risks: “Describe each documented risk, its stated impact, and its assigned mitigation. Do not invent probability ratings or owners.”
- Résumé accomplishments: “Add confirmed accomplishments for this role as concise bullets. Preserve supplied metrics; do not estimate missing numbers.”
Avoid guidance such as “make this complete” or “fill in any missing details.” Tell the agent to omit, flag, or label information that the sources do not establish.
A section can also have a Reference example: sample content the agent uses as a model for that section.
Set export formatting
Nothing is exported at this stage. These settings are stored on the Blueprint, and every document written from it inherits them — they take effect later, when someone saves a finished document as PDF or Word.
In Review & export:
- Upload a Header logo
- Add optional Header text
- Select Show page numbers when page numbering is needed
The Export preview shows how that header and numbering will appear on a finished document.
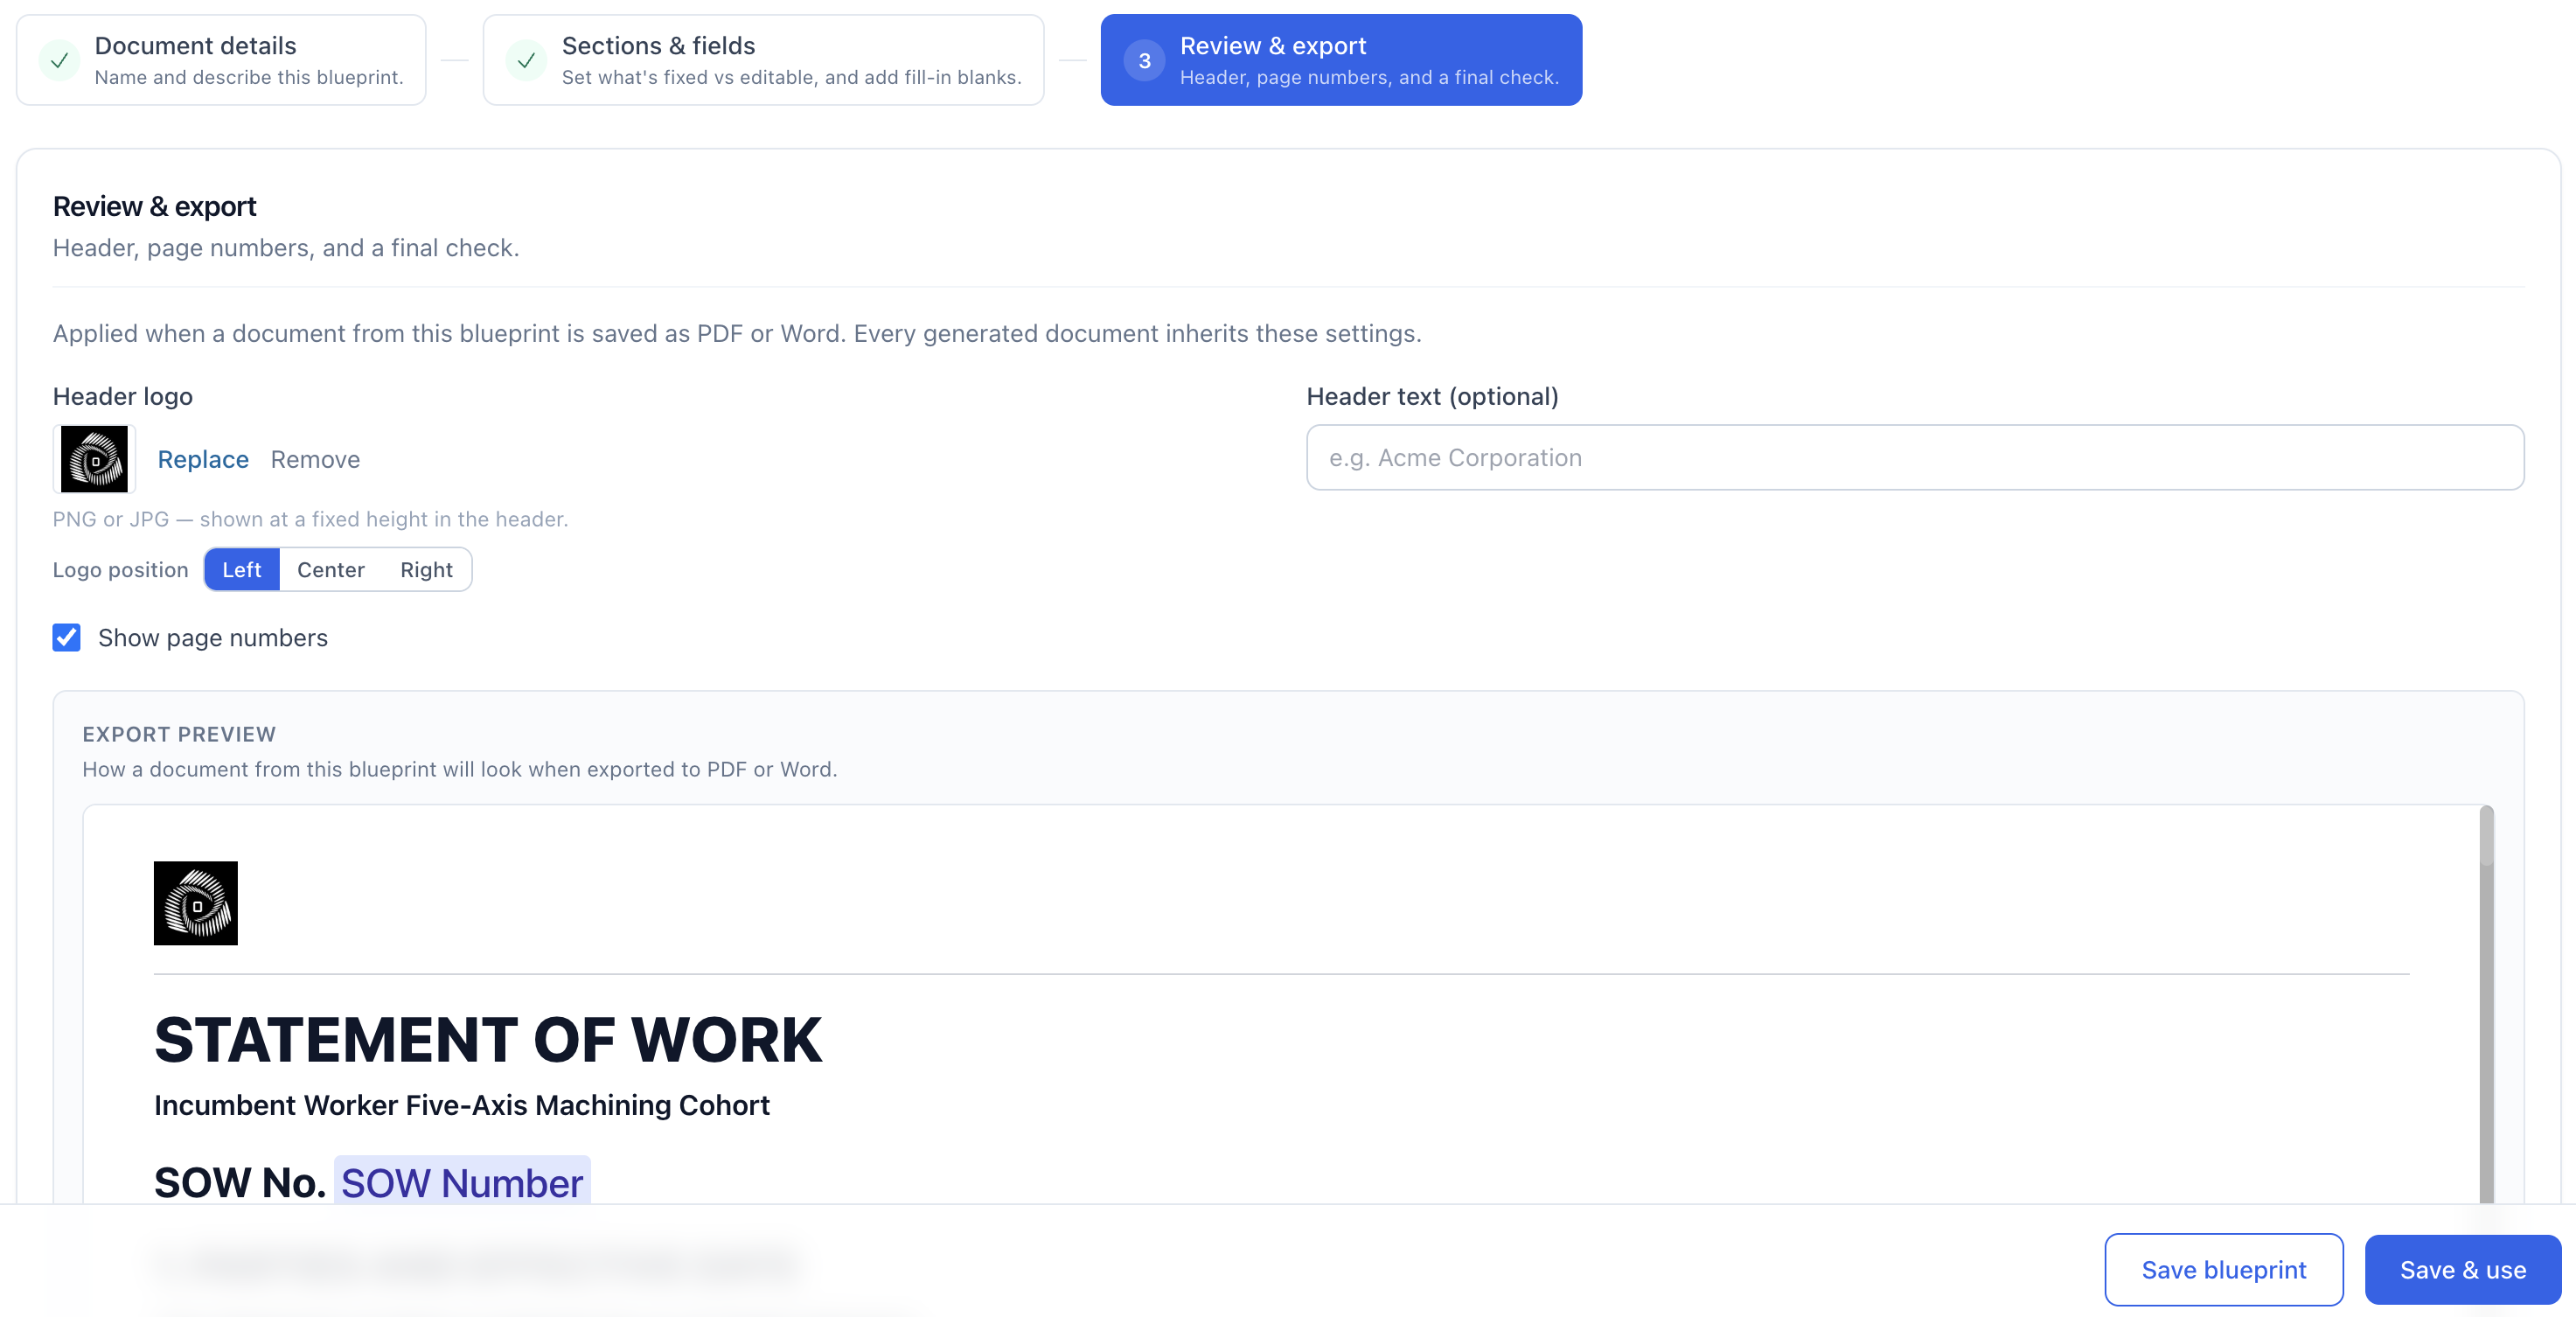
Set the header and page-number formatting that documents from this Blueprint will inherit. Shown here in the editor for a saved Blueprint.
Save and preview
Select Create blueprint (Create document for a document you maintain over time). Ordify saves it and returns you to Library → Blueprints.
Select the Blueprint's card to preview the structure you built. From the preview, choose Open in editor to revise the Blueprint, or Use blueprint to start writing a document with it (Update for a document you maintain over time).
In the editor, the save buttons are Save blueprint and Save & use (Save & update for a document you maintain over time).
Part 2: Write a document with the Blueprint
Start a document
There are two ways in:
- From Drive — open Drive, select + New → New document, and pick a Blueprint from the list
- From the Library — open Library → Blueprints, open a Blueprint, and select Use blueprint
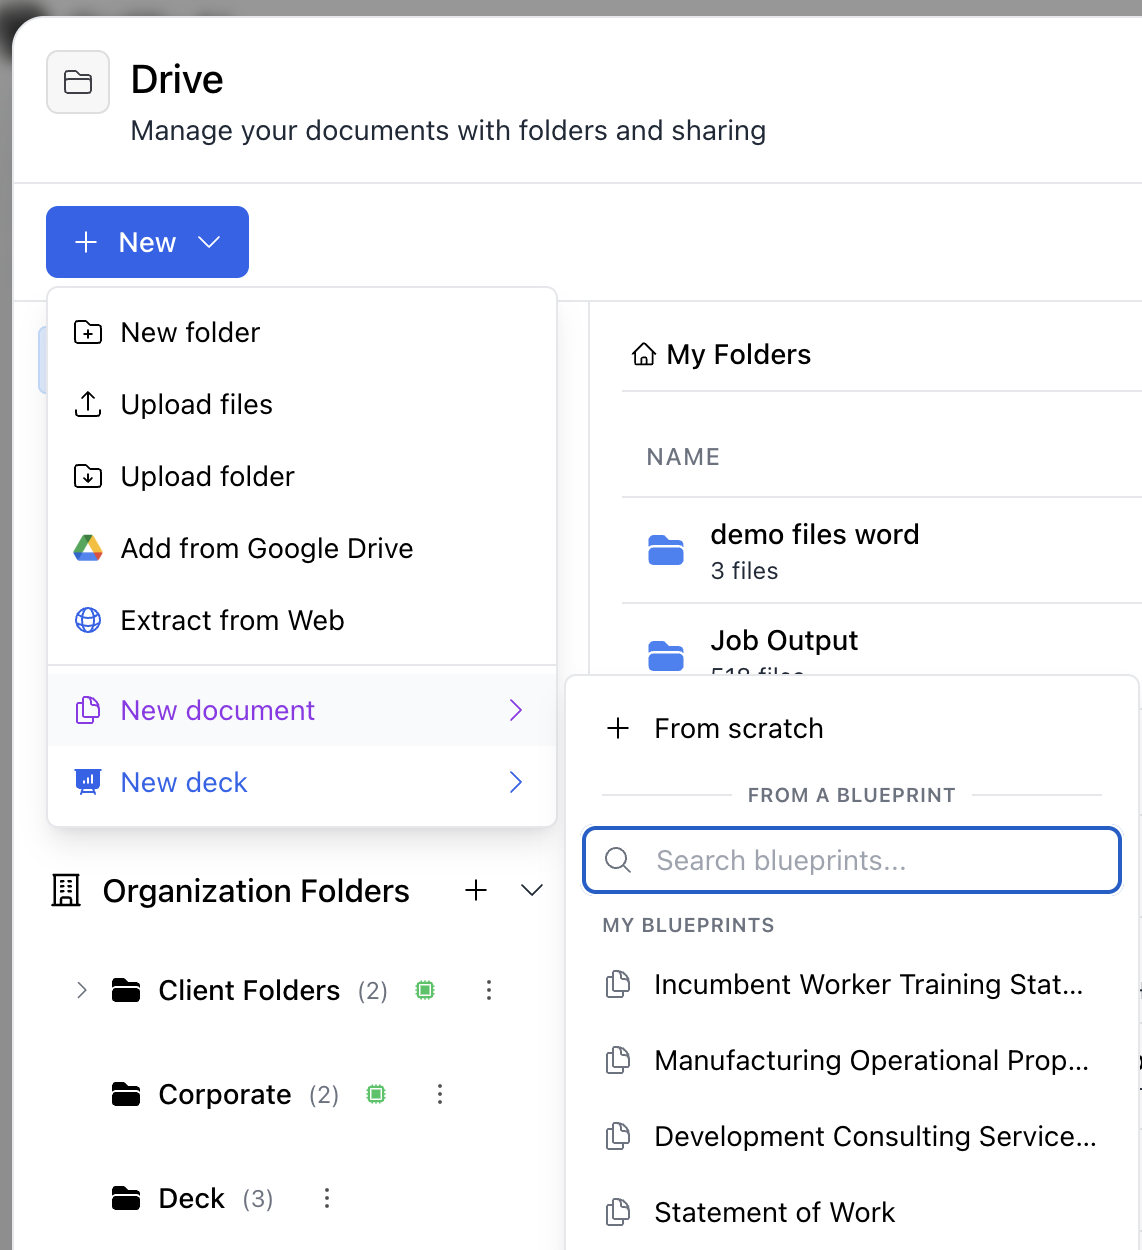
In Drive, select + New → New document, then choose a Blueprint.
Either way, the guided workflow is Setup → Context → Details → section review, followed by the final document editor. Details appears only when the Blueprint has fill-in fields.
Step 1: Setup
- Enter the required document name.
- Optionally choose the agent that will draft the document. If you do not choose one, the default assistant is used.
- Select Continue.
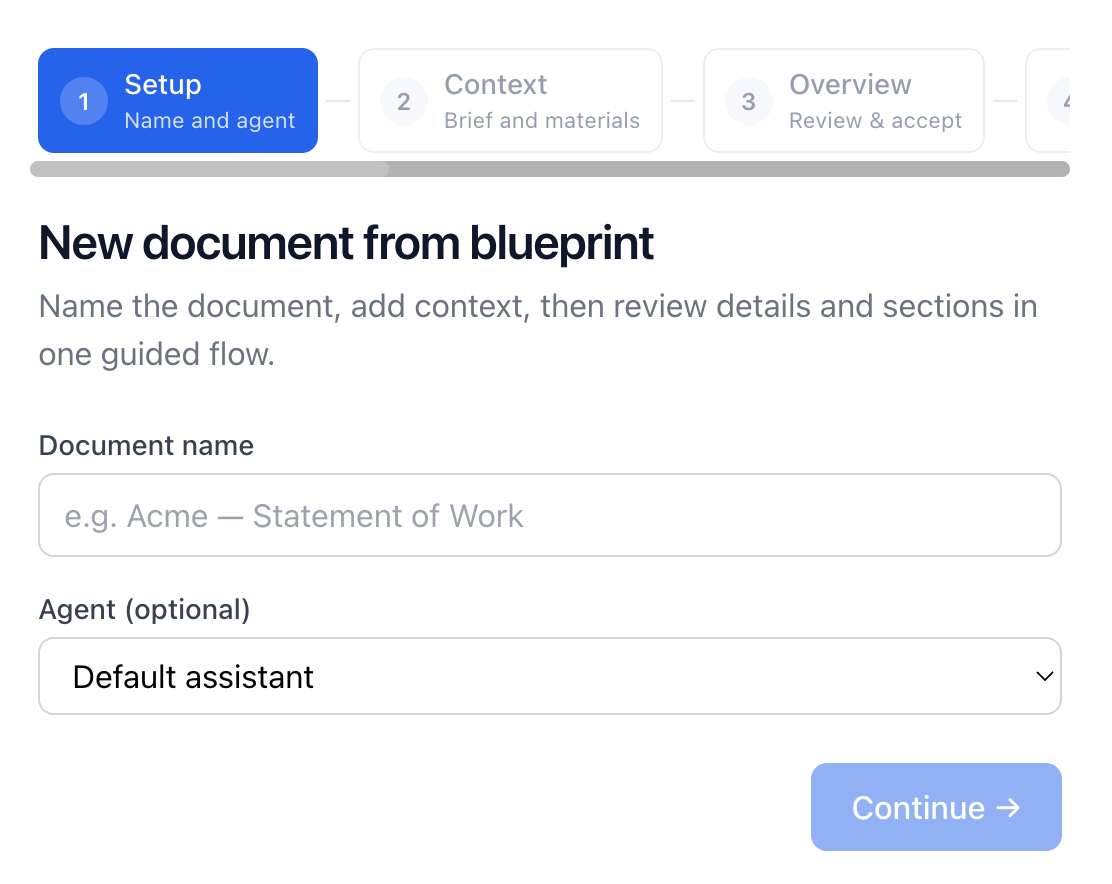
Name the document and optionally choose the drafting agent during Setup.
Step 2: Context
- Type a brief describing what the document should contain.
- Use Add Context to attach supporting material when needed.
- Include confirmed names, dates, scope, owners, deadlines, decisions, and constraints.
- Select Create & draft.
Step 3: Details
If the Blueprint has fill-in fields, enter their values — the fields defined while building it, such as client name, dates, or project identifiers. These are inserted directly into the document, so enter confirmed values rather than placeholders.
Step 4: Review each section
Each section is reviewed in turn. The section's writing guidance sits on the left with a chat box for refining the draft; the draft document is on the right.
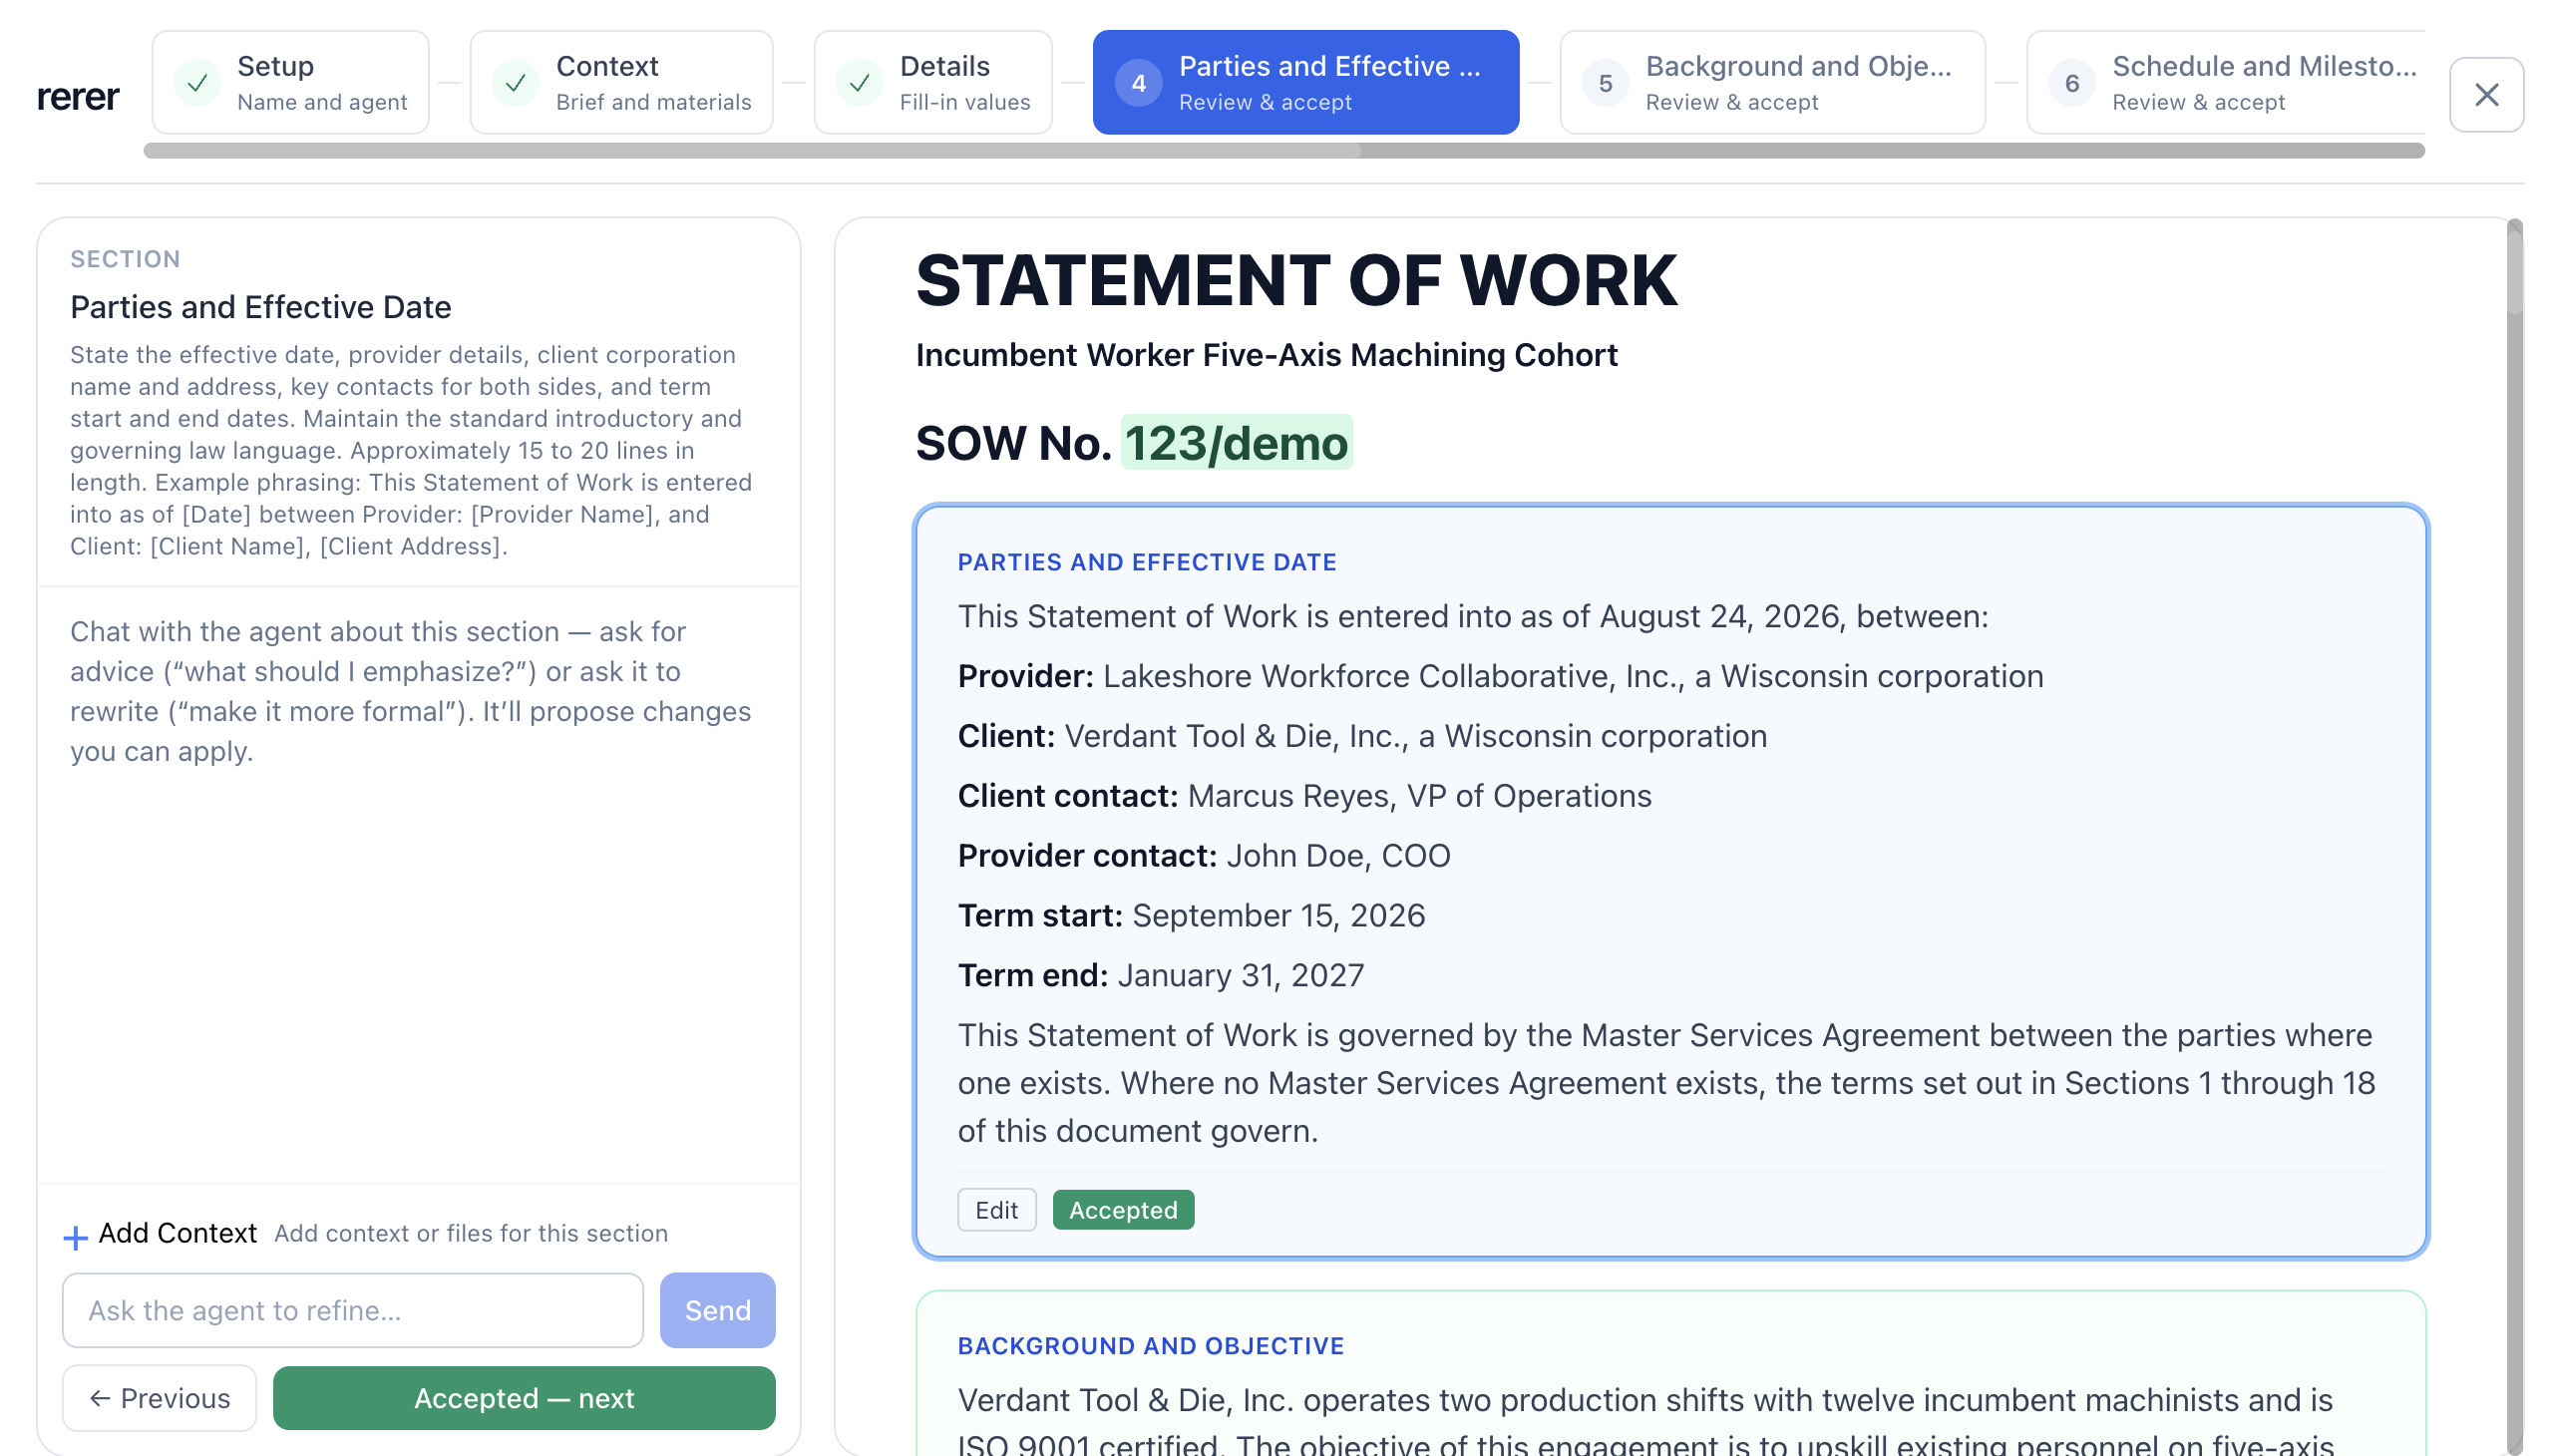
Review each section against its guidance, refine it with the agent, then accept and continue.
For each section you can:
- Edit the generated text directly
- Ask the agent to refine it — "what should I emphasize?", "make it more formal"
- Add Context to supply material the section is missing
- Accept & next → to accept the section and move to the next one (Accept & finish → on the last section)
When a section needs information from another source, use Add Context, provide the confirmed material, and review the updated draft before accepting it.
After section review, the complete document opens in the editor for final manual changes.
Fact-check before you share
Before saving or sharing:
- Compare the draft with every source document and attachment.
- Check names, dates, amounts, attendance, owners, deadlines, decisions, and quoted language.
- Confirm content appears in the correct section and fixed language has not been unintentionally changed.
- Remove unsupported claims and label unresolved details for follow-up.
- Check tone, formatting, and internal consistency.
- Have the appropriate owner review sensitive, legal, financial, or customer-facing content.
Save or export
Save or export the document from the final editor. PDF and Word exports use the header and page-number formatting set on the Blueprint. The finished document appears in Drive, in the folder you saved it to.
Use a Blueprint from an agent in chat
Agents can work with Blueprints directly in a conversation — listing the Blueprints you have access to and starting the fill workflow without opening the Library first.
To enable it:
- Open the agent and go to the Integrations tab.
- Select Ordify Productivity.
- Tick Blueprints.
- Save the agent.
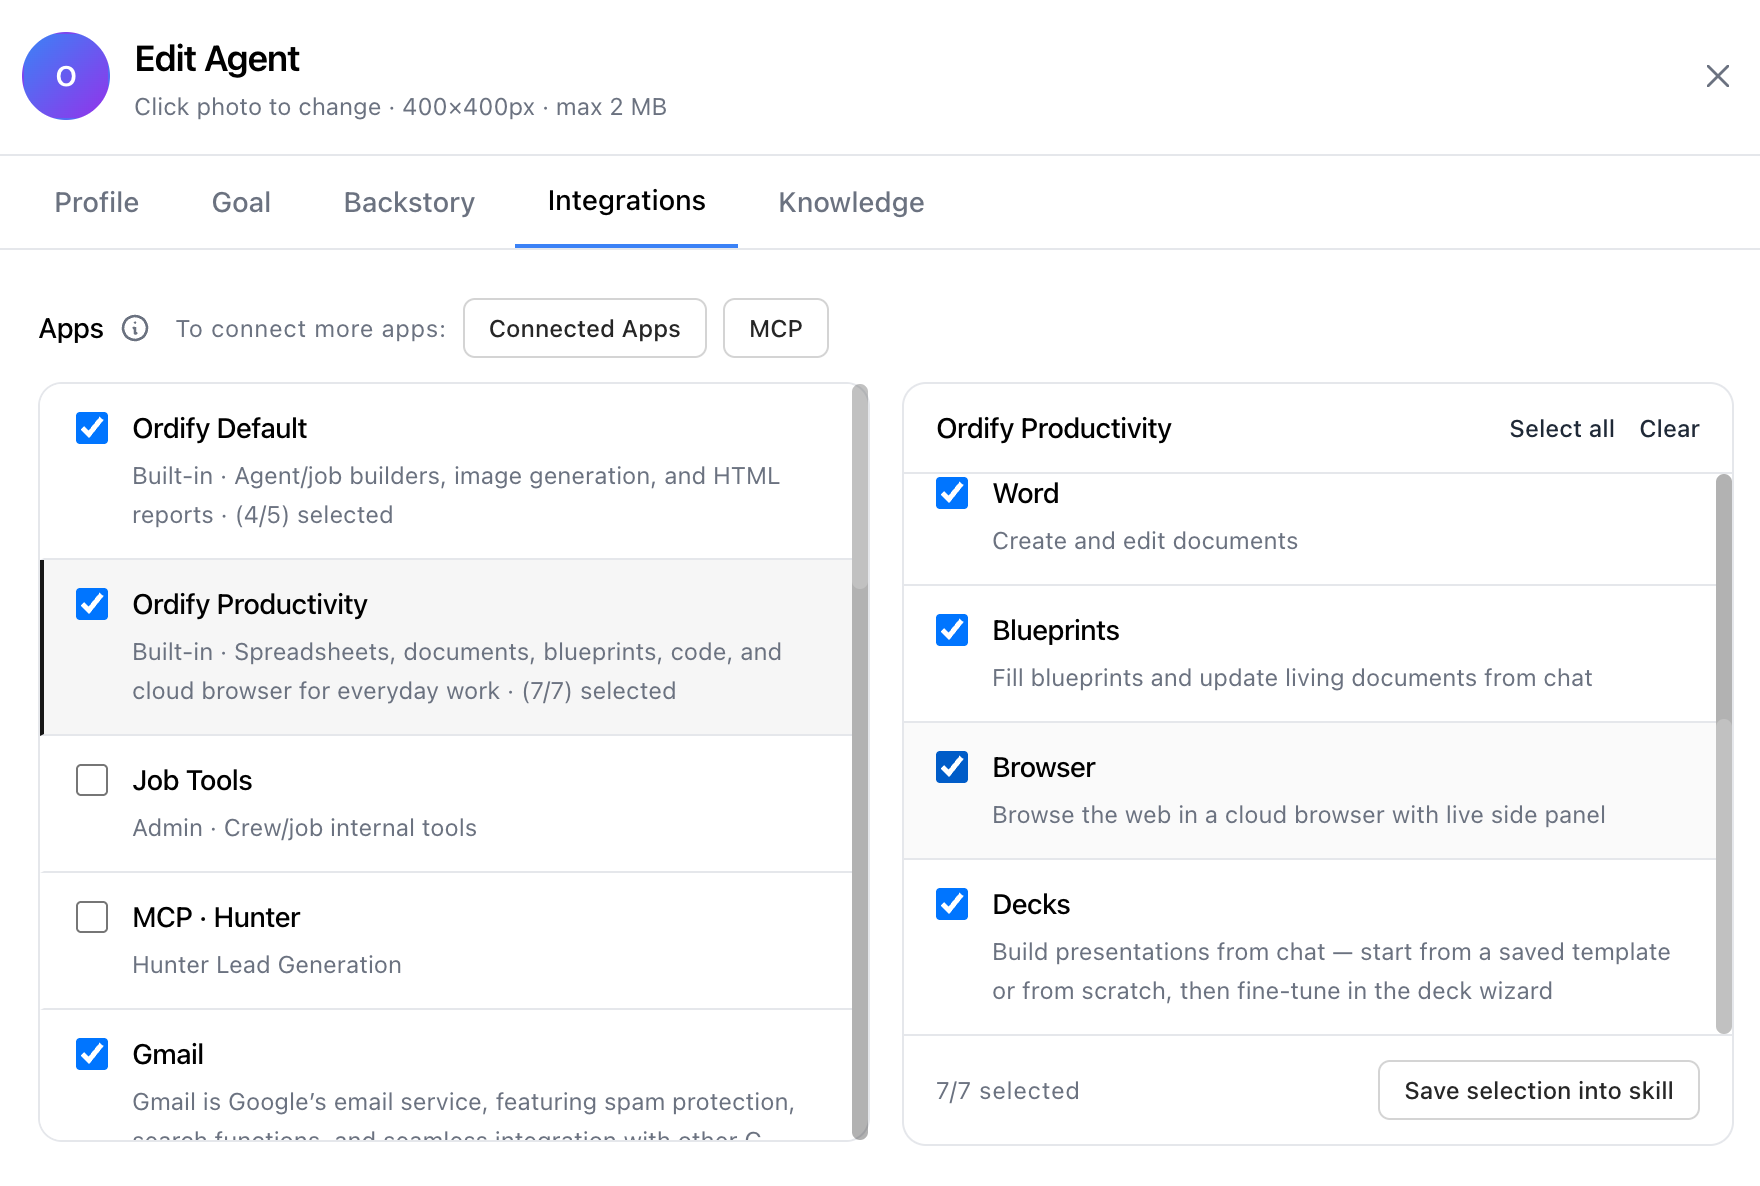
Enable the Blueprints tool so an agent can find and fill Blueprints from chat.
With the tool enabled, ask the agent for a Blueprint by name or ask which ones are available, and it hands off into the same guided fill workflow.
The Blueprints tool works in conversation, not inside a job. An agent running as a task in a job cannot fill Blueprints.
Agents created before per-tool selection was introduced may already have Blueprint access without an explicit selection. If an older agent can reach Blueprints and a newer one cannot, check the Blueprints tool in the newer agent's Integrations tab.
Documents you maintain over time
Some documents are not produced fresh each time — a CV, a capability statement, a running project record. For those, build the Blueprint with This is a single document I maintain over time ticked.
The difference is in how you use it. Instead of generating a separate document per run, you return to the same document and add new confirmed context, and Append sections accumulate rather than being rewritten.
With the box ticked, some labels change: the name field reads Document name, the create button reads Create document, and the preview offers Update instead of Use blueprint.
When building one:
- Tick This is a single document I maintain over time at the start.
- Decide which sections stay stable and which should collect new information.
- Set the collecting ones to Append.
- Select Create document, add current context, and review every update before accepting it.
What's next
- Blueprints — return to the Blueprint overview and category index.
- Drive — learn how to find and organize documents.
- Create an agent — configure an agent for drafting work.
- Chat basics — learn how to work with agents in conversation.